Friday, June 28, 2013

Project Pantry

A while back, March!, I had goals about organizing my life and house.  Hubby had some projects and I did too.  We revisited our garage entry, the household command center was created, and the kids got their very own gallery wall

Well then I got really busy at school and I put a lot of things on hold.  But now that Summer Vaca. is here I have had some time to finish a couple projects.  I am going to talk today about the Pantry!

I didn't get a good before picture, but about half way through emptying the pantry I snapped these:
 In the picture below you can see that we have tried to organize before.  The racks on the inside of the door are all our spices and then below are the boxes of wraps.
 This is what I had taken out already. 

So my first step was to clean out the entire pantry.  It was a lot.  Every available surface in my kitchen was covered!

Here is a better angle of the spice racks on the inside of the door.  We got these several years ago at the container store.  I would love a shopping spree in that store.  :)

 Here is everything removed!

And Tadaaa! The new and improved pantry!

OK!  So I went through all the bottles and boxes and threw out everything that was old and expired.  I put the few cans that we had onto a new 2 layer lazy susan.  Then I organzed according to type: snacks, oil and vinager, bulk items, breakfast items and breads.  Our pantry also holds the everyday linens for the table such as napkins and placemats.  I moved these down to a lower level so that my pint sized helpers could actually reach them.
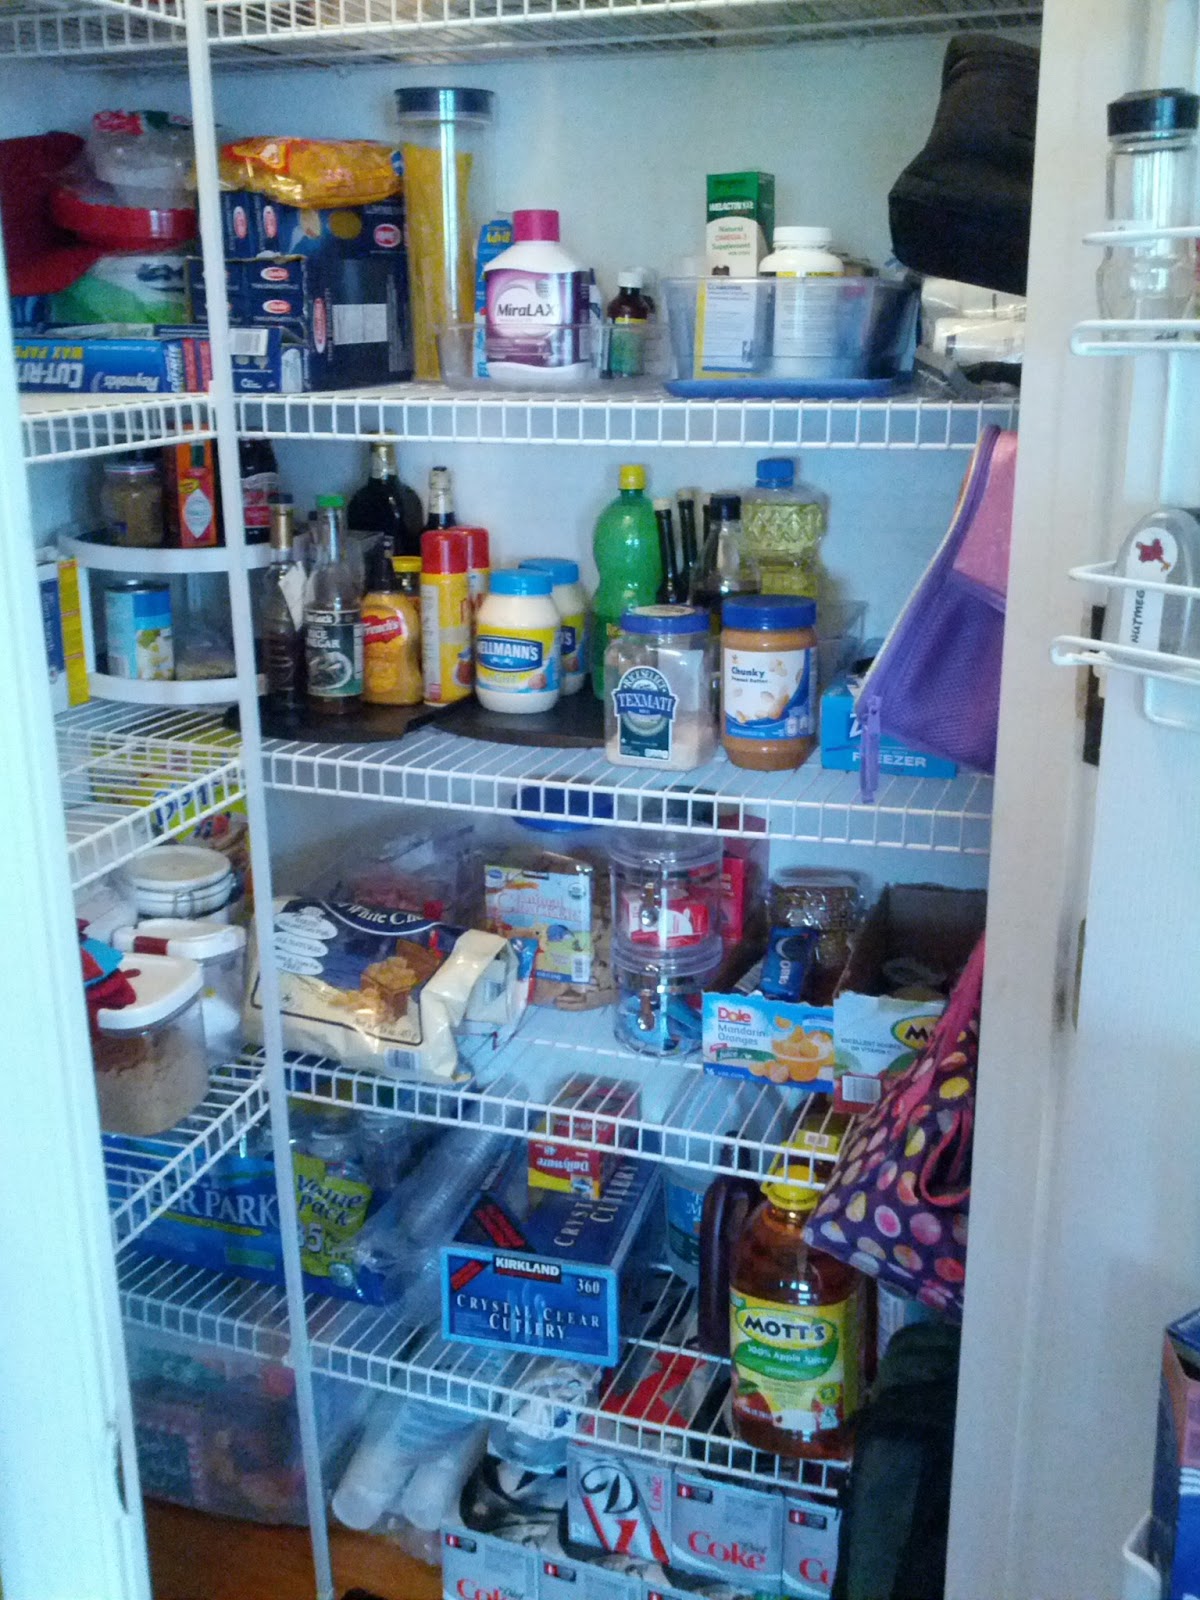
I also moved the kids snacks down to a reachable level and the dog gear and medications up out of reach.  Then I installed some sink baskets and command hooks to either side of the door to hold lunch boxes as shown below and seasoning packets (didn't get a picture).

Overall I am really impressed with the new pantry, It definitely looks better.  Now if only I can get Hubs to use it.  :)
 
Emily

Tuesday, June 25, 2013

Father's Day Cards!

This is a little late but there are people who received these cards that read my blog.  I had a workshop in late May to make Father's day cards and this is what we created:

This first one is from the CTMH Artiste Cricut cartridge.  I cut the shirt out of the Chantilly B&T Duos and the tie from Honey.  I stamped the sentiment in Hollyhock ink. 

 
This second one was inspired by Pinterest taken from the CTMH boards and Jeanette Lynton's Blog (here).  I took a white daisy card, and layered with lagoon, ruby, and white daisy.  Plane is stamped in outdoor denim, the banner is surrounded by hollyhock and sentiment is in desert sand.  "dad" was cut from the Artiste out of craft cardstock.  Clouds stamped in sky.

The third was also inspired by Pinterest, a fellow consultant at Playing with Paper (here).  I made a template and cut out the shape from a white daisy card. Then using another template, cut out the patterned paper.  The spatula was made from a 0.25" Art Philosophy tag on the shimmer paper and the glove is actually a mitten from one of the two CTMH cartridges but I can't remember which one, in craft.  The tag in the pocket is black and ruby and stamped in black.

 
I hope that these inspire your creativity!
 
Emily

Friday, June 21, 2013

More sewing

Happy Friday!

I am so glad that it is summer!  Well here it is the end of the first week of my summer vacation and I have accomplished much. 

First, Daughter had her birthday party at the local community pool and it was great!  Afterwards we opened her presents.  One of which is the sewing project that I wanted to share with you today.  Warning, these were completed from a vague idea in my head and I couldn't find a tutorial online with directions.  I also just used scrap fabric and Velcro that I had laying around, and whatever thread was already threaded in the machine. 
Bandages!!!
 For her birthday, Daughter wanted a play doctors kit.  She had one a long time ago but it has been missing pieces for years.  Anyway, she got a Doc McStuffins doctor bag complete with magical stethoscope.  If you do not know who Doc McStuffins is you should check her out on the Disney Channel, she is cool!  But we have always had the issue of using baby wipes and tissues for bandages because everything feels better with a band-aid!  So these were included in her doctor kit.

I found some white muslin in my fabric stash ripped them into various sizes and then sewed Velcro at key points and then zig-zag stich around the outside to keep the layers together.
Here is one of Daughter's new toys with a bandage on her leg.  Must have been rough in that box!
 
 
Second, I have been busy cleaning and organizing and planning above party.  But I feel like this is enough for one post so I will talk about those next week.
 
Emily

Tuesday, June 18, 2013

Sewing up a Storm

Hello,

Officially it is summer break but with the threat of rain and the cooler weather it really doesn't feel like it yet.  However, with our family vacation just days away I am really looking forward to a break.

This is a shout out to all my fellow consultants who are at Convention, bring me back some goodies?

I am sorry that I have not posted in a while it has been busy and I have been trying to finish a couple projects.  First off I am a decent seamstress.  I can get by most of the time with some directions, but I am not adventurous.  So when I purchased my fabric for the cushion cover for the window seat that my husband made for me, I was extremely hesitant about cutting into it.  I had to work up my nerve.  :)  And because of that it has taken forever.  I still need pillows and with birthdays and our vacation I am just not going to get it done this week so here is a preview of the cushion and I will post again when the whole project is all completed and picture worthy.  I found a great tutorial for the piping and the construction of the cover by Pretty Handy Girl.

Usually my sewing machine lives in the closet of my craft/scrapping room.  So when I do drag it and all the paraphernalia out I like to get a lot done.  I have been meaning to try my hand at a dress for Daughter for about a year.  I found a tutorial online by The Mother Huddle and fabric the Daughter picked out and then school started....  So while my sewing machine was out I tried it.

Just a cute little pillowcase dress from a fat quarter bundle.  It doesn't come through in the picture but Daughter liked the fabric because the butterflies are glittery.  Here is the front.

Back.  Sorry about the nosey dog in the background.

This was when I said "pose"!  She is such a Ham sometime.  Well after I had finished her dress, I actually had enough left over for a doll dress.  I had no measurements like for the kid version but I was feeling adventurous so, Daughter's American Girl Doll got a dress too.  Now, I am not happy with it completely.  It is too tight but it was a lot of work to take out the seams and "let it out". And Daughter was happy with it the way it is.


I will post again before the end of the week.  I have Father's day cards and another sewing project to share with you.

Emily

Monday, June 3, 2013

Graduation Cards.

Hello all,

I have delayed this post because I thought that I might be writing about the great bench cushion that I had finished but the stars were not in my favor and I am not done, YET!  But to keep this old blog going I thought that I would share the graduation cards that I did with my card class in May.  It was a Dads and Grads card class but I do not have pixs of the dad cards yet, But I will share my take on a pin I found for a great folded grad card.

Original post with instructions found here at Jill's Ink.  It is a great tutorial with a video.  You can follow me on pinterest to see what other things I have been thinking about.

Here is my take:
This was an actual card that was given to someone, I have made some changes but do not have pictures.  In this card I made the tassel out of embroidery floss but it is time consuming so for my workshop I had the girls make them out of grosgrain ribbon like in the tutorial.  I have attached this tassel with glue dots but in my other I have it attached with a button brad and I like the look of the brad better.

I also added the option of an envelope on the lid, but didn't use it for this card.  I found that the more accurate I was with measuring and marking for the diagonal lines the better it looked.  I was rushed making this card and it shows.  I used George Mason's colors because that is where this individual graduated from.
 
I like the uniqueness of this card and my clients really thought that they came together quickly and look sharp.  If you would like help completing a similar project please let me know.

Emily