Showing posts with label Home improvement / organization. Show all posts

Wednesday, July 3, 2013

Window Seat! DONE!

Ok so I made a major milestone today:  I finished the pillows for the window seat (learn more here and here).  I picked up some coordinating fabric this morning and finished sewing them this afternoon (I love Summer).  I still need to get books out of the basement and onto the shelves but that is going to take me forever!  So here is the final (?) touch to the seat:
Here are the pillows that I did today!  I meant for the squares to be the same fabric and the long on to be the other but I had issues with my fabric cutting, see below.

Here is the lovely seat (at least I think so) with the pillows.

Close up of the fabrics all together.


I used the directions here for the square pillows, it was really easy to follow and came out looking great.  However, this is where my measurements were off.  She says to make the length 1.5 times the length of the pillow, well I had an 18 in pillow so I figured 27 inches.  So I got 1 yard of the floral fabric for 2 square pillows (27x2=54 width of the décor fabric bolts), and 1/2 yard of the paisley for the long pillow.  Well I started to cut out my fabric and I realized that the 36 inches barely provided for any overlap, and I was lucky because she cut the paisley at 19 1/2 inches instead of 18.  So if you try this at home I would do 2.5 times the width of the pillow form, which is what I ended up doing.  On a side note until 7/7/13 Joanne Fabrics has the 54 in décor fabrics on sale for 50% off.

For the long pillow I used the general directions found here.  However, I made my own piping following the techniques that I used on the cushion not on the bias.

I hope that you are enjoying this rainy day.  There will be another post today so stay tuned!!!!!

Emily

Friday, June 28, 2013

Project Pantry

A while back, March!, I had goals about organizing my life and house.  Hubby had some projects and I did too.  We revisited our garage entry, the household command center was created, and the kids got their very own gallery wall

Well then I got really busy at school and I put a lot of things on hold.  But now that Summer Vaca. is here I have had some time to finish a couple projects.  I am going to talk today about the Pantry!

I didn't get a good before picture, but about half way through emptying the pantry I snapped these:
 In the picture below you can see that we have tried to organize before.  The racks on the inside of the door are all our spices and then below are the boxes of wraps.
 This is what I had taken out already. 

So my first step was to clean out the entire pantry.  It was a lot.  Every available surface in my kitchen was covered!

Here is a better angle of the spice racks on the inside of the door.  We got these several years ago at the container store.  I would love a shopping spree in that store.  :)

 Here is everything removed!

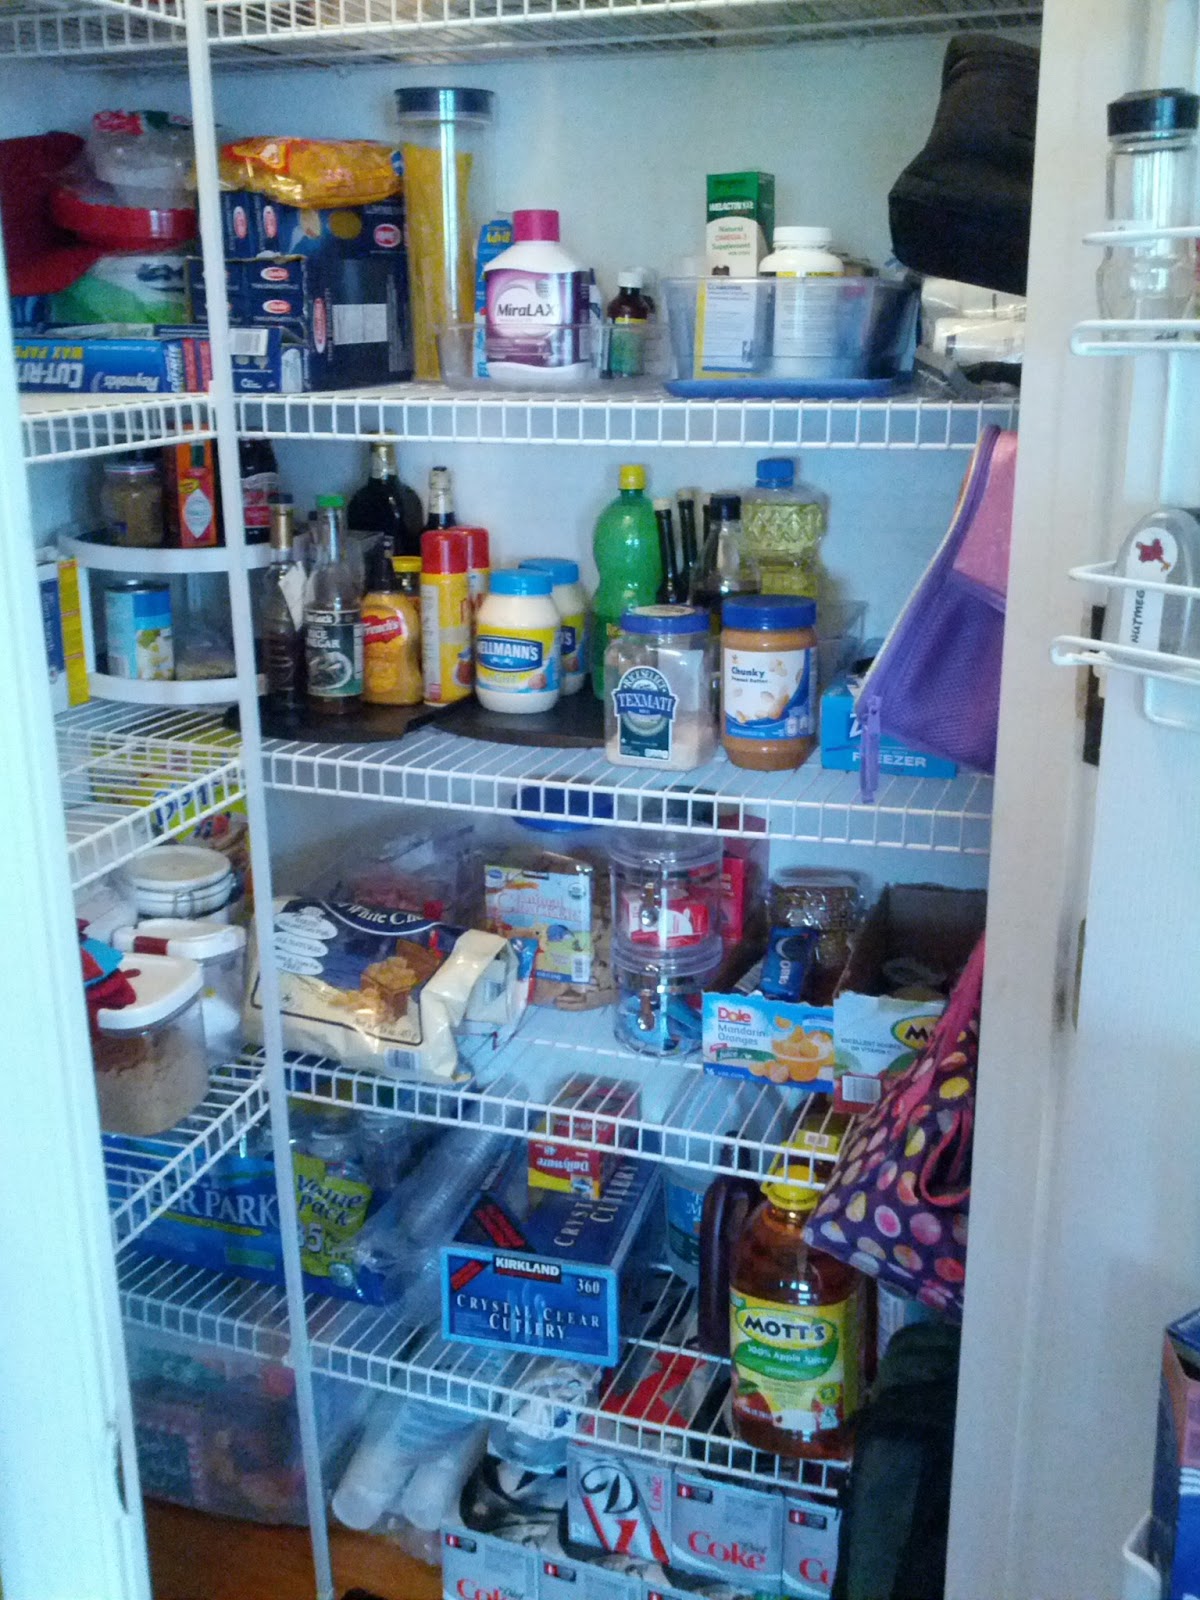
And Tadaaa! The new and improved pantry!

OK!  So I went through all the bottles and boxes and threw out everything that was old and expired.  I put the few cans that we had onto a new 2 layer lazy susan.  Then I organzed according to type: snacks, oil and vinager, bulk items, breakfast items and breads.  Our pantry also holds the everyday linens for the table such as napkins and placemats.  I moved these down to a lower level so that my pint sized helpers could actually reach them.
I also moved the kids snacks down to a reachable level and the dog gear and medications up out of reach.  Then I installed some sink baskets and command hooks to either side of the door to hold lunch boxes as shown below and seasoning packets (didn't get a picture).

Overall I am really impressed with the new pantry, It definitely looks better.  Now if only I can get Hubs to use it.  :)
 
Emily

Friday, June 21, 2013

More sewing

Happy Friday!

I am so glad that it is summer!  Well here it is the end of the first week of my summer vacation and I have accomplished much. 

First, Daughter had her birthday party at the local community pool and it was great!  Afterwards we opened her presents.  One of which is the sewing project that I wanted to share with you today.  Warning, these were completed from a vague idea in my head and I couldn't find a tutorial online with directions.  I also just used scrap fabric and Velcro that I had laying around, and whatever thread was already threaded in the machine. 
Bandages!!!
 For her birthday, Daughter wanted a play doctors kit.  She had one a long time ago but it has been missing pieces for years.  Anyway, she got a Doc McStuffins doctor bag complete with magical stethoscope.  If you do not know who Doc McStuffins is you should check her out on the Disney Channel, she is cool!  But we have always had the issue of using baby wipes and tissues for bandages because everything feels better with a band-aid!  So these were included in her doctor kit.

I found some white muslin in my fabric stash ripped them into various sizes and then sewed Velcro at key points and then zig-zag stich around the outside to keep the layers together.
Here is one of Daughter's new toys with a bandage on her leg.  Must have been rough in that box!
 
 
Second, I have been busy cleaning and organizing and planning above party.  But I feel like this is enough for one post so I will talk about those next week.
 
Emily

Tuesday, June 18, 2013

Sewing up a Storm

Hello,

Officially it is summer break but with the threat of rain and the cooler weather it really doesn't feel like it yet.  However, with our family vacation just days away I am really looking forward to a break.

This is a shout out to all my fellow consultants who are at Convention, bring me back some goodies?

I am sorry that I have not posted in a while it has been busy and I have been trying to finish a couple projects.  First off I am a decent seamstress.  I can get by most of the time with some directions, but I am not adventurous.  So when I purchased my fabric for the cushion cover for the window seat that my husband made for me, I was extremely hesitant about cutting into it.  I had to work up my nerve.  :)  And because of that it has taken forever.  I still need pillows and with birthdays and our vacation I am just not going to get it done this week so here is a preview of the cushion and I will post again when the whole project is all completed and picture worthy.  I found a great tutorial for the piping and the construction of the cover by Pretty Handy Girl.

Usually my sewing machine lives in the closet of my craft/scrapping room.  So when I do drag it and all the paraphernalia out I like to get a lot done.  I have been meaning to try my hand at a dress for Daughter for about a year.  I found a tutorial online by The Mother Huddle and fabric the Daughter picked out and then school started....  So while my sewing machine was out I tried it.

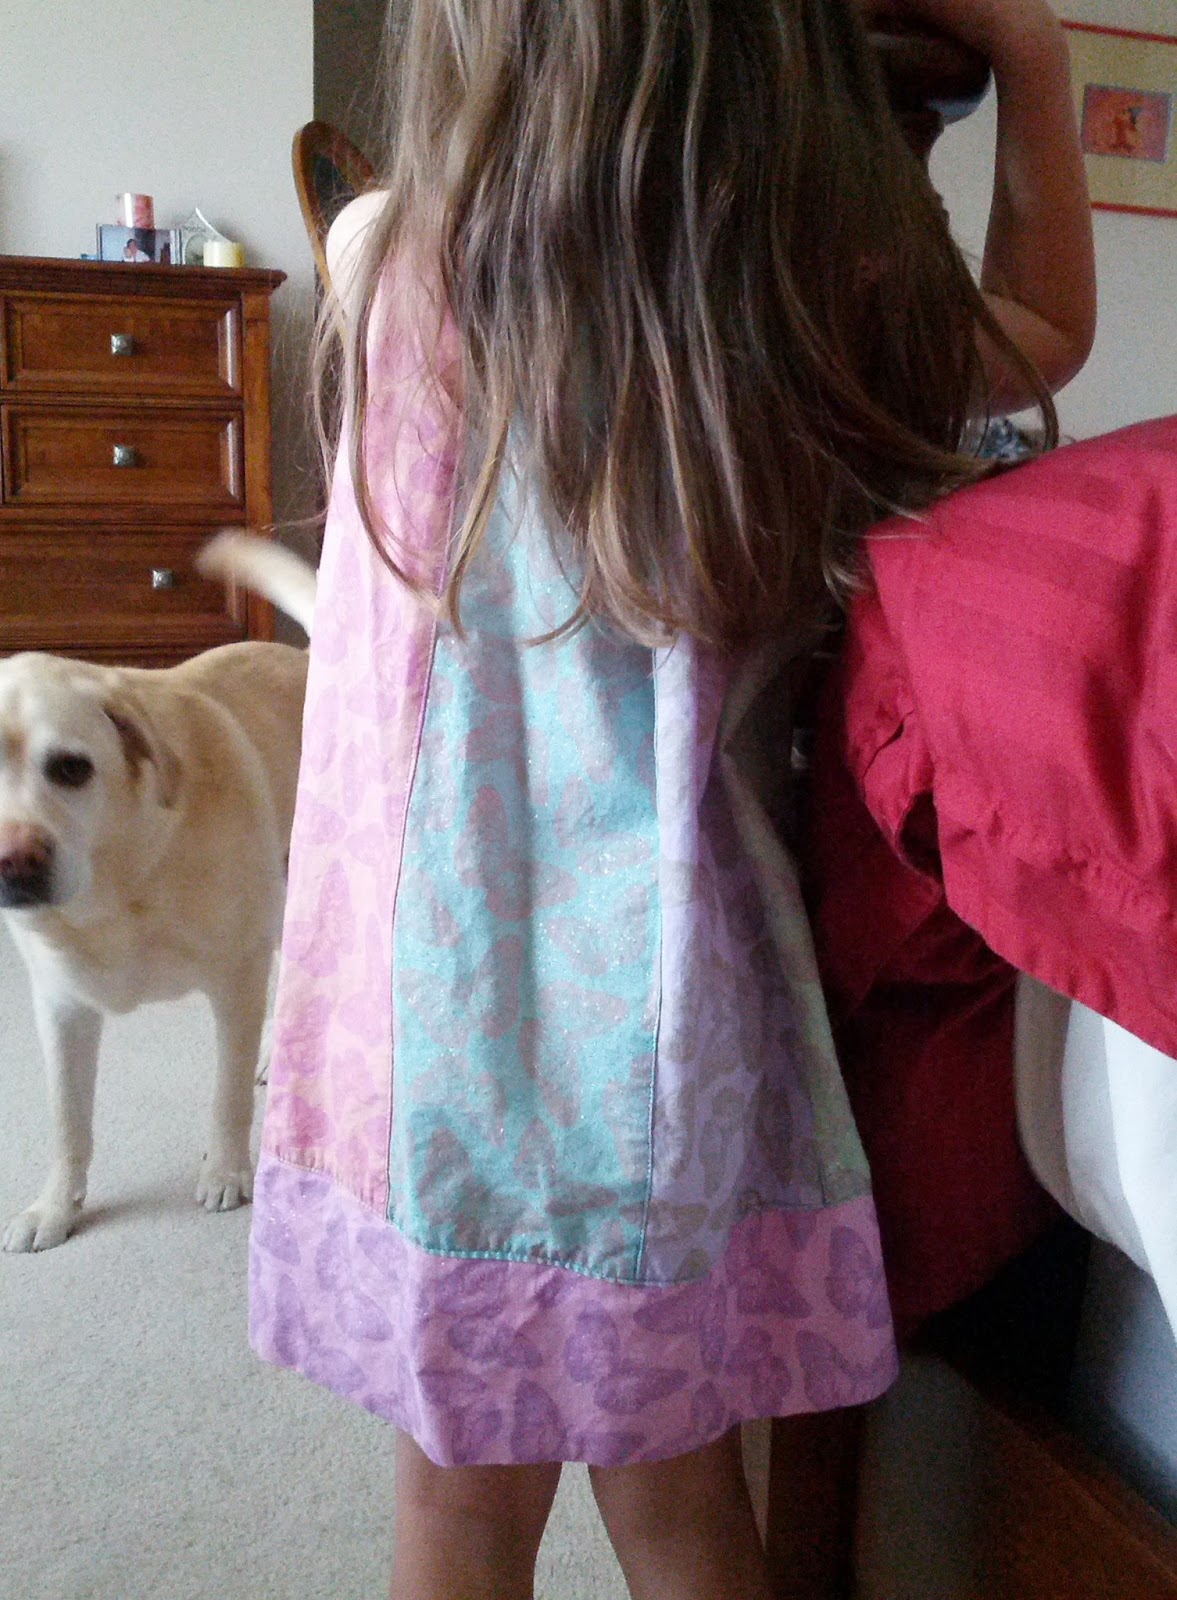
Just a cute little pillowcase dress from a fat quarter bundle.  It doesn't come through in the picture but Daughter liked the fabric because the butterflies are glittery.  Here is the front.

Back.  Sorry about the nosey dog in the background.

This was when I said "pose"!  She is such a Ham sometime.  Well after I had finished her dress, I actually had enough left over for a doll dress.  I had no measurements like for the kid version but I was feeling adventurous so, Daughter's American Girl Doll got a dress too.  Now, I am not happy with it completely.  It is too tight but it was a lot of work to take out the seams and "let it out". And Daughter was happy with it the way it is.


I will post again before the end of the week.  I have Father's day cards and another sewing project to share with you.

Emily

Thursday, May 2, 2013

Well, we are almost there!

As you know my goal this spring was to organize and beautify my house.  We did the kids school stuff, and the kitchen counter clutter, and all the daily paperwork.  I also decided this spring that it was time to take a new look at our master bedroom.  I have wanted a window seat, well, FOREVER!!!  The idea of curling up with a good book in front of a window really sounds like heaven to me.  I had pseudo ones after college in my first apartment and in high school by pushing the bed under the window.  And then I have been making due in this house with first a bag chair on the deck and then once our office was complete there is a comfy chair in front of a window there.  However, these were sad attempts.  Well, last night dear Husband final put the finishing touches on my new window seat in my own master bedroom!!!

Now, while he may be done with it, I am not!  I need to get/make curtains, a cushion, some big fluffy pillows, and put all my books on the shelves (we built shelves in the office and I still have books in storage downstairs, I may need an intervention.  :) )  Anyway,  for those looking for ideas here is the process!
Before, but with the carpet removed and the tools laid out!

The frame!

The seat.  The middle portion of the seat opens!

One set of shelves!

Other set of shelves

Oh! The in-bench storage!

With the beginnings of trim.

Painting for DAYS!!!! I actually helped with this part.  :)

All painted with the "door holes" cut in the face.  Oh and notice the NEW blinds!

The painted cubbies (or boy cages, Just kidding!  Although I did close him in just once to see if he fit  : )  ).  Yes they do have lights in them with magnetic switches. Husband doesn't know how to do anything halfway.
And here you have the current state of the bedroom.  Got the totes at Costco for $20 for 3.  Wish it had been 4, but I am thinking of a way to make it still look symmetrical.  The doors took forever to get here and then had to be painted but I think it was worth the wait.  Now, I just need to make a decision on fabrics and find some time to sew!  I will share when it is all done but it might not be until after school is OUT!

Emily
 

Monday, April 8, 2013

Family Comand Center

Wow!  Where did spring go?

I hope that your weekend was nice.  I got some stuff done but not all, and I will have to go and finish it as soon as I finish this post.  So this is the last piece of my kitchen organization project for now.  We have a home for the schoolwork and art (at least a display solution) and for the gear.  Now I just need a way to organize all the other stuff... paperwork and coupons and daily stuff.

Before:  We have a mail basket that collects all the mail for the week that Husband goes through once a week to pay the bills.  We had the payroll paperwork for our nanny. And then there is all the misc. stuff that collects on the counters.

After:  I needed a place to put papers with a quick turn around and other things that if I put them "away", away is where they will stay.  I also needed a solution for the employer paperwork and for my mounds of coupons.  This is what I came up with:

So there is a large corkboard made out of.... corks by Husband, a basket for keys and such, a tin bucket for pens, the mail basket, and my NEW family file!
We already had the key and mail basket system down.  The corkboard holds the items that need my immediate attention.  Then there is the family file.

I took a vertical file that I found cheap at Target and covered it with two strips of cardstock, I used liquid glass to attach the paper so that I would be sure that it stayed.  Then I cut letters and a decorative file label from the Cricut.  Then I salvaged a cute binder clip and hanging file folders from my classroom stash.  Each member got their own tab, a tab for coupons, and a tab for our Nanny's paperwork.  So far it has looked great and is working!

I also cut out a label for the pen bucket out of the same vinyl as the gallery wall for added cuteness.
 
I hope that this inspires you to get organized!  Hopefully soon I will have some layouts to share.  :)
 
 
Emily

Friday, April 5, 2013

Coat and Shoe Organization

Happy Friday!

I am so glad that the week is over.  It is so hard getting back in the groove after a week off.  The end of last week was horrid because our house was overrun with the stomach flu and general cold bugs!  Both, BOTH, of the little ones got the stomach flu ON THE SAME DAY!  and then Daughter couldn't seem to get better and then I got a bad head cold that, even though I feel better today, it is still making me want to just go to bed.

I just had a lovely evening with all my gal pals.  And since I picked up the house in preparation for their arrival and with the start of warm weather, I thought that I would share the boot/coat solution I was telling you about.

Before:  We use the garage to enter and exit the house.  That is where the cars are and the most convenient door.  The coat closet is by the half bath - the whole length of the house away.  So, when we enter the house all the shoes and coats and hats and gloves and .... all go near the garage door.  OK, only one problem, this is in my kitchen!  No mudroom!  No small hallway! Just the kitchen. 

We had a temporary solution with a small set of hooks for the kids coats and a basket for their shoes.  There was a desk also in the kitchen that we do not really use as a desk so big shoes went under there.  This arrangement was fine for a while.  Then we added the backpacks!  And a second set of little shoes and boots and then come the hats and mittens and snowsuits.  So.............

The solution: 

My wonder of a husband built me the bench and it was painted a nice semi-gloss white.  I covered a piece of foam with some nice durable fabric and attached it to the bench.  Add corner round for a built-in look and TA DA.  Mud room in 2 feet of space.

The Art wall is to the right in the picture!  Little shoes go in one of the baskets and hats and stuff go in the other.  My work and running shoes go in the bottom sections.  And Husband's shoes are too big for anything so they are still under the desk, but one pair is better than six.


Here is a close up of the bench.  It is sturdy and give the kids a place to sit, instead of the dirty rug that keeps the dirt down in the rest of the house.

There is more to the kitchen organizational project coming!  Next up:  Command center!

Emily